

Today, I am going to introduce to you another really great product! It is called a blender pen. A blender pen is a special pen that is filled with a clear blending solution. There are several brands out there, but my personal favorite is the Dove Blender. There is just something about the blending solution in this particular pen that I prefer.

If you go right to the Dove Blender site, you will see that you can not only get the pens, but replacement nibs as well as extra solution. As with any tool, in order to get the most success out of it, you need to make sure that you take proper care. If you just want to give it a try, you can get a starter kit with comes with a pen, a small bottle of blending fluid as well as 3 new nibs. Believe me, you'll love this product. Would I steer you wrong??

Since you now know where to get one, it's probably a good idea that I give you some of the whys and hows. Here is a list of reasons why I personally enjoy using a blender pen:
- Blender pens allow me to use products that I already have in new and unique ways...such as watercolor pencils, water based ink pads and markers
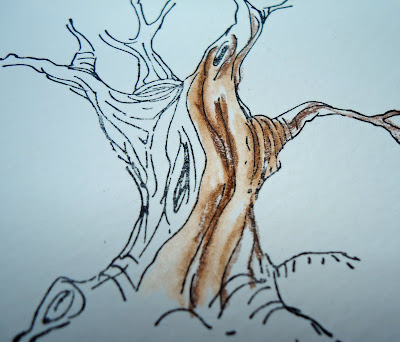
- I am able to achieve a watercolor look (as you can see in the image above) without using water. (What's the big deal about water?? Well, for one, depending on how much is introduced to the paper you are using it can cause it to curl or peel. Then there are papers that don't lend themselves to traditional watercolor at all, such as gloss coated cardstock.)
- Blender pens work on several surfaces and it takes the guess work out of paper type. They work on cardnstock, watercolor paper, copy paper, vellum, wood...and more!
- I have more control when it comes to using dark color markers.
Those are just a few of the reasons! Another cool thing about a blender pen is that you really only need one pen! When you are finished with a color, just make little x marks or roll the tip across a scrap piece of paper and the original color will come right out. Keep in mind that certain pigments (such as purples and reds) will stain the tip but the fluid will still come out clear. Then, when that tip gets all icky and gross, pull it out and toss in a new one.
Now here are some ways that I use my blender pen:
- Watercolor pencils: starting with your lightest color working to your darkest , color in your image without going all the way to the edges. use the blender pen to blend the colors together and move the color out to the edges
- Watercolor pencils: as shown below, use the pencil to trace over all the detail lines, then pull the color out to the rest of the image
With the following techniques, you want to pay close attention to how dark or light you want your color to be. You can always make the color darker, but you cannot take the color away once it's there.
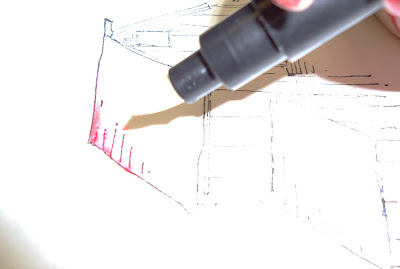
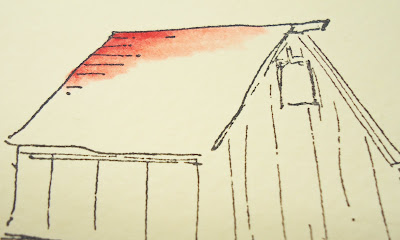
- Water based stamp pads: lightly brush the tip of the blender pen onto the pad and then color your image by starting where you want the color to be more concentrated...then work from that point out every time you add color to your pen. As you pull the color out from your starting point, it will get lighter.
- Water based markers: use the same technique as above, except touch pen tip to pen tip. You can also use a palette if you want. I either use the information side of an old CD (believe it or not, I have a bunch of the old AOL CDs that they used to send in the mail!) or a glossy ceramic tile. Just draw onto the palette with your marker and pick the color up on your blender pen from there. When you're done, you can just wipe the palette clean with a damp paper towel and save for reuse!
Do you use blender pens? I am sure everyone would like to know how you use yours! I'd love to hear your comments about blender pen techniques!
Don't forget...Thursday is week 6 of the Sizzix Triple Play Blog Hop. Check back in...I wouldn't want you to miss it!
Artfully yours,
Theresa
No comments:
Post a Comment